codex-image2-skill
用于在codex里面生图的skill
Safety scan
A static text scan, not a guarantee. Select the badge to see what was scanned and every finding.
Check it deeper on your machine
It has changed since its scan on 11 Nov 2026.
As a Claude Code plugin, install it and then ask Claude Code:
/plugin marketplace add keithmackay/mackayi/plugin install scanskillsafety@mackayiDo a deep scan of https://github.com/fengfengzhidao/codex-image2-skill with scanskillsafety
Or from a terminal, clone it and run it:
git clone https://github.com/keithmackay/scanskillsafety-skill ~/.claude/skills/scanskillsafetynode ~/.claude/skills/scanskillsafety/cli.cjs --deep 'https://github.com/fengfengzhidao/codex-image2-skill'
It checks the exact commit: every file, its packages against OSV (api.osv.dev), how it compares with this page's scan (findsafeskills.com receives the repository's address), and, if you agree, Claude reading every file with your own Claude subscription. It never runs the code.
Badge for your README

Markdown
[](/listings/fengfengzhidao--codex-image2-skill)HTML
<a href="/listings/fengfengzhidao--codex-image2-skill"><img src="/api/listings/fengfengzhidao--codex-image2-skill/badge.svg" alt="findsafeskills safety rating" /></a>Install
Install instructions from the README
As written by the repo's author. findsafeskills has not verified these steps.
最简单的方式是把本项目地址发给 Codex,让它帮你安装:
请帮我安装这个 Skill:
https://github.com/fengfengzhidao/codex-image2-skill
也可以手动安装。
Windows PowerShell:
git clone https://github.com/fengfengzhidao/codex-image2-skill.git
Copy-Item codex-image2-skill\codex-image2 "$HOME\.codex\skills\codex-image2" -Recurse
macOS / Linux:
git clone https://github.com/fengfengzhidao/codex-image2-skill.git
cp -R codex-image2-skill/codex-image2 ~/.codex/skills/codex-image2
What was scanned
The files the safety scan read, as written by the repository's author and shown as plain text. Lines with a finding are marked.
README.md · README · 244 lines
View this file on GitHub (read at the repository's current version: the scan did not record which commit it read)
This file has changed since it was scanned, so this is not exactly the text that was scanned, and no line is marked. The findings are listed with the safety scan above.
- # Codex Image2 Skill
- 让 Codex 通过自定义 API 地址和密钥生成或编辑图片。支持验证任意 `gpt-image` 系列模型,自动优先使用 `gpt-image-2.5`,其次为 `gpt-image-2`,再选择服务商列出的其他 `gpt-image` 模型。
- ## 为什么做这个 Skill
- 最近使用 API 中转服务时,我发现不少中转站已经把 `gpt-image-2` 从常规模型列表中移出,导致 Codex 无法像以前一样直接发现并调用生图模型。
- 于是我写了这个 Skill。原理很简单:
- 1. 从本地保存的配置读取 API 地址和密钥(兼容旧环境变量);
- 2. 直接调用 OpenAI 兼容的图片生成或编辑接口;
- 3. 将返回的图片保存到项目中;
- 4. 让 Codex 检查图片并展示最终结果。
- 仓库已经提供 Windows 和 macOS 的原生可执行文件。普通用户不需要安装 Python、Node.js、Go 或其他依赖。
- ## 功能
- - 文生图
- - 单图或多图编辑
- - 可选 PNG Mask 局部编辑
- - JSONL 并发批量生图
- - 支持 Base64 和 URL 两种图片响应
- - 自动重试网络超时、429、5xx 和 524 错误
- - 输出文件覆盖保护
- - API Key 脱敏,不写入 Skill 或日志
- - 中文本地配置页:填写、保存、检测,无需配置环境变量或重启 Codex
- - Windows 当前用户加密保存密钥;macOS 使用系统钥匙串
- - 支持任意 `gpt-image` 系列模型通过配置验证,自动优先选择 `gpt-image-2.5`,其次为 `gpt-image-2`,并支持其他系列模型和显式指定模型
- - 内置 Windows x64/ARM64 与 macOS Intel/Apple Silicon 可执行文件
- ## 如何使用
- 这个项目包含:
- - 开源项目:**codex-image2-skill**
- - Skill 名称:**codex-image2**
- ### 1. 安装 Skill
- 最简单的方式是把本项目地址发给 Codex,让它帮你安装:
- ```text
- 请帮我安装这个 Skill:
- https://github.com/fengfengzhidao/codex-image2-skill
- ```
- 也可以手动安装。
- Windows PowerShell:
- ```powershell
- git clone https://github.com/fengfengzhidao/codex-image2-skill.git
- Copy-Item codex-image2-skill\codex-image2 "$HOME\.codex\skills\codex-image2" -Recurse
- ```
- macOS / Linux:
- ```bash
- git clone https://github.com/fengfengzhidao/codex-image2-skill.git
- cp -R codex-image2-skill/codex-image2 ~/.codex/skills/codex-image2
- ```
- ### 2. 配置 API 地址和密钥
- 安装后,直接对 Codex 说:
- ```text
- 使用 $codex-image2,帮我配置图片服务。
- ```
- Codex 会打开一个**仅在本机运行的中文配置页**:
- 1. 填写服务商提供的 **API 地址** 和 **API 密钥**。
- 2. 点击 **保存配置**,程序先检查当前密钥的模型权限,通过后保存。
- 3. 返回 Codex,告诉它“已保存”,即可开始生图。
- **无需设置环境变量,也无需因为保存配置而重启 Codex。** 首次安装 Skill 后若尚未被识别,仍可能需要重新打开 Codex。
- 地址可填写服务根地址、以 `/v1` 结尾的地址或完整图片接口地址,程序会自动整理。请使用 HTTPS;本机调试可使用 HTTP 回环地址。
- 首次使用的默认地址为 `https://apinebula.ai/v1`。已经保存的自定义地址会保留。
- 已保存密钥后,点击 **显示** 可以在本地页面查看;点击 **隐藏** 会清空展示的已保存密钥,显示 30 秒后或切换离开页面时也会自动隐藏。密钥不进入 Codex 聊天或浏览器持久存储。
- - **保存配置**时先请求当前密钥的模型列表。包含任意 `gpt-image` 系列模型即可通过验证并正常保存,包括 `gpt-image` 和以 `gpt-image-` 开头的模型 ID,例如 `gpt-image-1`、`gpt-image-1-mini`、`gpt-image-2.6`。没有系列模型、模型列表隐藏或不兼容时会提示未确认权限,用户可确认服务支持生图后点击 **仍然保存**。密钥鉴权失败、网络、限流或服务错误时需修正后重试。
- - **检测连接**:只请求模型列表,不发起生图请求。页面显示当前密钥能访问的模型名称和数量,突出显示生图模型及自动选择结果;修改地址或密钥后会清除旧列表。部分中转站隐藏图片模型,模型列表列出也不代表图片接口一定可用。
- - **测试生图(可能计费)**:需单独确认,生成 1 张低质量图片;不自动重试,不自动保存当前填写的配置。
- - 密钥直接输入本地页面,请勿发给 Codex 聊天。保存与检测时会向你填写的 API 地址请求模型列表;只有单独确认生图测试或正式生图时才请求生成图片。
- 也可以双击 Skill 文件夹内的 `配置图片服务.cmd`(Windows)或 `配置图片服务.command`(macOS)。macOS 如未保留执行权限,可让 Codex 帮你打开配置页。
- 配置页会在 15 分钟后自动失效;点击“完成配置,关闭本地服务”可提前结束。链接失效后,让 Codex 重新打开即可。
- ### 3. 指定 Skill 生图
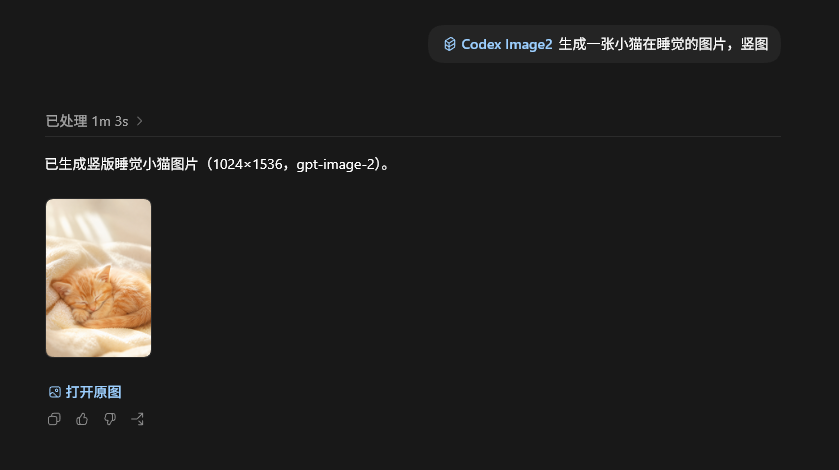
- 配置保存后,在请求中指定 `$codex-image2` 即可:
- ```text
- 使用 $codex-image2 生成一张图片:
- 一只戴着宇航员头盔的橘猫站在月球表面,远处可以看到地球,电影感灯光。
- ```
- 
- 改图示例:
- ```text
- 使用 $codex-image2 修改这张图片:
- 只把背景替换成雪山,人物、服装、姿势和构图保持不变。
- ```
- ## CLI 用法
- 通常直接在 Codex 中指定 Skill 即可,不需要手动执行 CLI。下面的命令适合调试或自动化。
- 选择与你的系统匹配的文件:
- | 系统 | 可执行文件 |
- | --- | --- |
- | Windows x64 | `codex-image2/bin/codex-image2-windows-amd64.exe` |
- | Windows ARM64 | `codex-image2/bin/codex-image2-windows-arm64.exe` |
- | macOS Intel | `codex-image2/bin/codex-image2-darwin-amd64` |
- | macOS Apple Silicon | `codex-image2/bin/codex-image2-darwin-arm64` |
- macOS 如果提示没有执行权限,运行:
- ```bash
- chmod +x codex-image2/bin/codex-image2-darwin-*
- ```
- 打开配置页、查看状态:
- ```powershell
- & "codex-image2/bin/codex-image2-windows-amd64.exe" configure
- & "codex-image2/bin/codex-image2-windows-amd64.exe" status
- ```
- `configure` 会启动独立的本地进程并立即返回,不占用 Codex 的执行等待。若不能自动打开浏览器,可使用返回的 `url`;`configure --no-browser` 只返回链接。无参数运行可执行文件也会打开配置页。`status` 只输出本地配置状态、来源、地址及路径,不输出密钥,也不验证远端 API 权限。
- 模型默认是 `auto`。以当前服务、当前密钥查询 `/v1/models`,优先使用 `gpt-image-2.5`,其次为 `gpt-image-2`,再从其他 `gpt-image` 系列模型中按模型 ID 字典序选择第一个。只有 `gpt-image-2.6` 时会自动使用它。列表隐藏、不兼容、查询失败或未列出任何系列模型时直接使用 `gpt-image-2`。查询最多等待 8 秒,同一批量任务复用查询结果。模型列表列出只代表服务商声明支持,实际可用性仍以图片接口为准。
- 显式传入 `--model gpt-image-2` 或 `--model gpt-image-2.5` 可以固定模型,跳过自动选择。批量任务每行的 `model` 也保留优先级。CLI 输出返回实际使用的模型;`--dry-run` 保持零网络请求,示例载荷使用 `gpt-image-2`,并以 `model_selection: auto` 标记未查询模型可用性。
- 生成图片:
- ```powershell
- & "codex-image2/bin/codex-image2-windows-amd64.exe" generate `
- --prompt "A tiny blue nebula inside a glass bottle" `
- --quality auto `
- --out "output/imagegen/nebula.png"
- ```
- 编辑图片:
- ```powershell
- & "codex-image2/bin/codex-image2-windows-amd64.exe" edit `
- --image "input.png" `
- --prompt "Replace only the background with a warm studio backdrop" `
- --out "output/imagegen/edited.png"
- ```
- 批量任务格式和完整工作流请查看 [`codex-image2/SKILL.md`](codex-image2/SKILL.md) 和 [`batch-format.md`](codex-image2/references/batch-format.md)。
- ## 从源码构建
- 普通用户不需要执行这一步。开发者安装 Go 后,可以运行:
- ```powershell
- $env:CGO_ENABLED = "0"
- $env:GOOS = "windows"
- $env:GOARCH = "amd64"
- go build -trimpath -ldflags "-s -w" -o codex-image2/bin/codex-image2-windows-amd64.exe ./codex-image2/src
- ```
- 源码只使用 Go 标准库。请构建整个 `src` 包,配置页 HTML 会自动嵌入可执行文件。
- ```powershell
- go test ./codex-image2/src
- go vet ./codex-image2/src
- ```
- ## 配置位置与旧版兼容
- 本地配置与 Skill 安装目录、当前项目分开,更新 Skill 不会覆盖配置:
- | 系统 | 配置文件 | 密钥存储 |
- | --- | --- | --- |
- | Windows | `%APPDATA%\codex-image2\config.json` | 当前 Windows 用户的 DPAPI 加密数据 |
- | macOS | `~/Library/Application Support/codex-image2/config.json` | 登录钥匙串,服务名 `codex-image2`;配置文件只保存引用 |
- 优先级:**本地完整配置 → 旧环境变量**。本地配置存在时,旧环境变量不覆盖它;配置损坏或密钥不可读时,程序会提示修复,不会偷偷切换服务。切换 API 地址时需要重新输入对应密钥,避免混用不同服务的配置。
- 旧用户可继续使用 `CODEX_API_URL` 与 `CODEX_API_KEY`。未配置本地文件时,API 地址默认使用 `https://apinebula.ai/v1`。通过配置页保存后即可迁移到本地配置。
- Linux 暂未提供预编译文件及本地凭据存储,源码构建后仍可使用旧环境变量。macOS 钥匙串可能出现系统授权或解锁提示;因运行中的任务可能仍在使用旧配置,更新密钥时会保留旧钥匙串条目,可在系统“钥匙串访问”中按服务名清理不再使用的条目。
- ## 超简单的方式
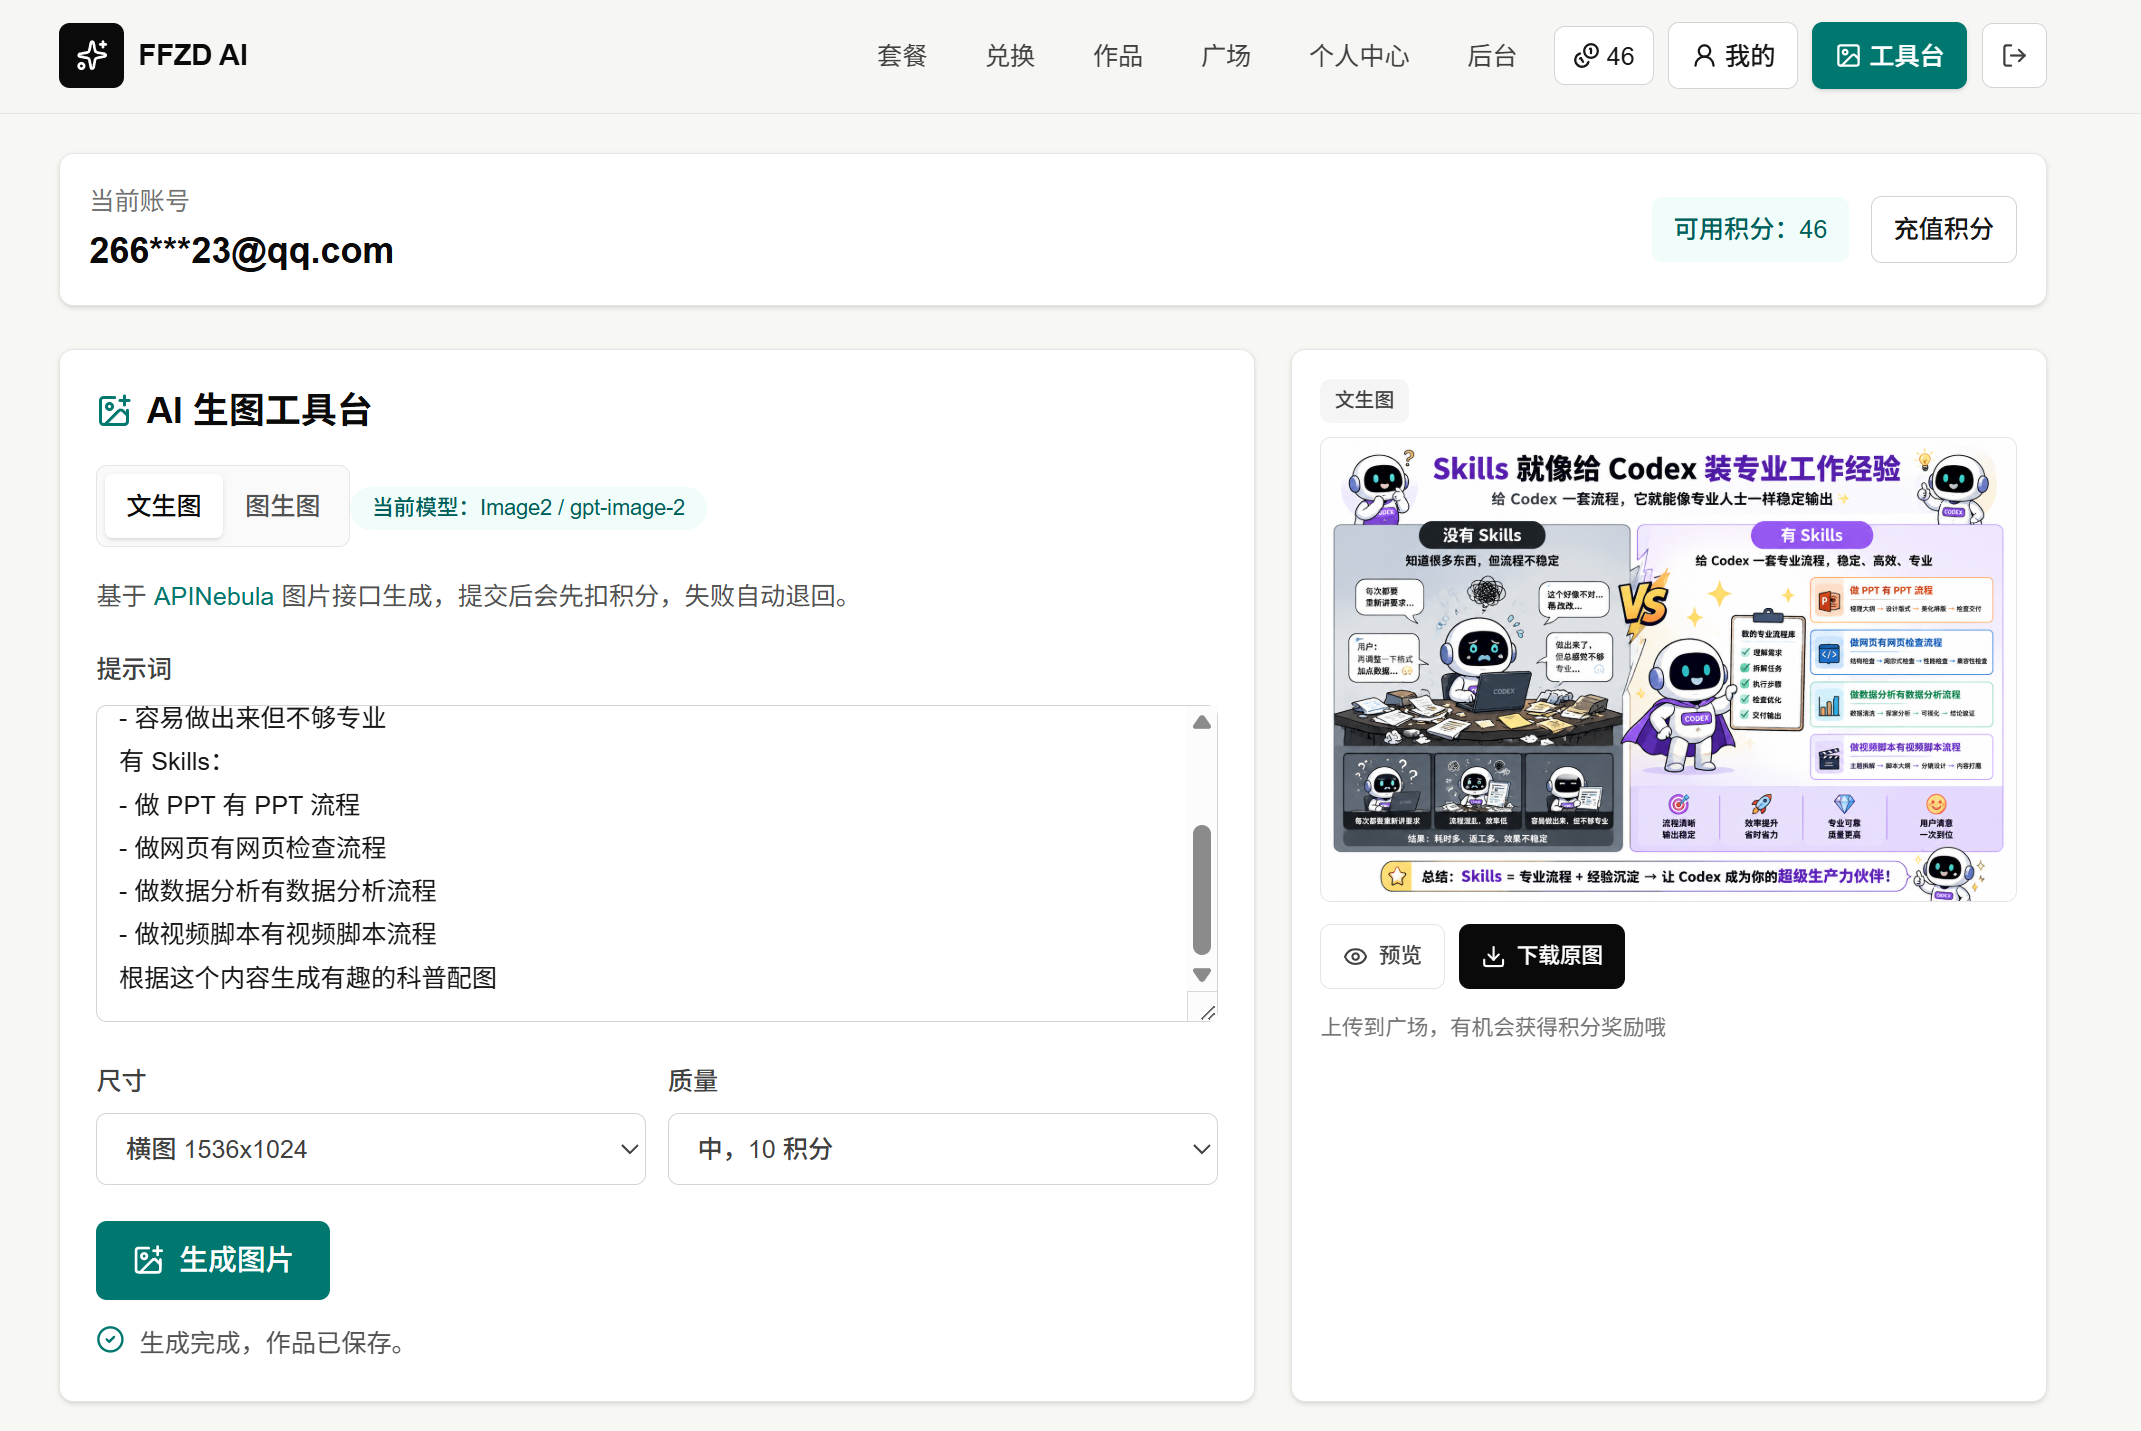
- 如果希望直接通过网站生图,也可以使用我开发的网站:
- ### [https://ffzd.ai/](https://ffzd.ai/)
- 支持文生图和图生图,打开网页即可使用。
- 
- ## 常见问题
- ### 配置后仍提示没有 API Key
- 让 Codex 运行 `status` 检查配置来源。新配置页保存后下一次调用即生效;如果提示凭据无法读取,请重新打开配置页保存,macOS 用户也可检查钥匙串是否已解锁。只有仍使用旧环境变量的用户,修改变量后可能需要完全退出并重新启动 Codex。
- ### 页面提示链接失效,或者刷新后无法连接
- 配置页有效期为 15 分钟,手动结束服务或退出系统后也会失效。让 Codex 再运行一次 `configure` 即可。页面刷新不会丢失已保存的配置;未保存的密钥需要重新输入。
- ### 接口返回 524 或超时
- 这通常表示中转服务的图片生成耗时超过了网关限制。可以尝试降低质量、使用 `1024x1024`、减少批量并发,或稍后重试。
- ### 是否支持所有中转站
- 中转服务需要提供 `gpt-image` 系列模型,并兼容以下接口。
- ```text
- POST /v1/images/generations
- POST /v1/images/edits
- ```
- 不同服务的参数支持和稳定性可能存在差异。
- ## 安全说明
- - 不要把真实 API Key 提交到 GitHub。
- - 不要把 Key 写进 Skill、提示词、截图或聊天消息。
- - 建议为不同服务使用独立密钥,并定期轮换。
- - 本地配置页仅监听 `127.0.0.1` 随机端口,使用临时访问凭据和来源校验,不加载外部脚本;密钥不进入页面 URL、浏览器持久存储、命令参数或程序日志。
- - Windows 使用当前用户 DPAPI 加密;macOS 使用系统钥匙串,不会将密钥明文写入项目或 Skill 文件。请勿把配置文件当作跨电脑通用备份;换电脑或系统用户后应重新配置。
- ## License
- [MIT](LICENSE)
Ratings and comments
Sign in to rate this skill.
Sign inFree to use. If it’s helped, pass it on.