jupyter-mcp-server
🪐 🔧 Model Context Protocol (MCP) Server for Jupyter.
Safety scan
A static text scan, not a guarantee. Select the badge to see what was scanned and every finding.
Check it deeper on your machine
It has changed since its scan on 11 Nov 2026.
As a Claude Code plugin, install it and then ask Claude Code:
/plugin marketplace add keithmackay/mackayi/plugin install scanskillsafety@mackayiDo a deep scan of https://github.com/datalayer/jupyter-mcp-server with scanskillsafety
Or from a terminal, clone it and run it:
git clone https://github.com/keithmackay/scanskillsafety-skill ~/.claude/skills/scanskillsafetynode ~/.claude/skills/scanskillsafety/cli.cjs --deep 'https://github.com/datalayer/jupyter-mcp-server'
It checks the exact commit: every file, its packages against OSV (api.osv.dev), how it compares with this page's scan (findsafeskills.com receives the repository's address), and, if you agree, Claude reading every file with your own Claude subscription. It never runs the code.
Badge for your README

Markdown
[](/listings/datalayer--jupyter-mcp-server)HTML
<a href="/listings/datalayer--jupyter-mcp-server"><img src="/api/listings/datalayer--jupyter-mcp-server/badge.svg" alt="findsafeskills safety rating" /></a>Install
Install instructions from the README
As written by the repo's author. findsafeskills has not verified these steps.
For comprehensive setup instructions—including `Streamable HTTP` transport, running as a Jupyter Server extension and advanced configuration—check out [our documentation](https://jupyter-mcp-server.datalayer.tech). Or, get started quickly with `JupyterLab` and `STDIO` transport here below.
1. Set Up Your Environment
pip install jupyterlab jupyter-collaboration jupyter-mcp-tools ipykernel
---
To confirm your environment is correctly configured:
1. Open a notebook in JupyterLab 1. Type some content in any cell (code or markdown) 1. Observe the tab indicator: you should see an "×" appear next to the notebook name, indicating unsaved changes 1. Wait a few seconds—the "×" should automatically change to a "●" without manually saving
This automatic saving behavior confirms that the real-time collaboration features are working properly, which is essential for MCP server integration.
---
2. Start JupyterLab
# Start JupyterLab on port 8888, allowing access from any IP and setting a token
jupyter lab --port 8888 --IdentityProvider.token MY_TOKEN --ip 0.0.0.0
---
If you are running notebooks through JupyterHub instead of JupyterLab as above, refer to our [JupyterHub setup guide](https://jupyter-mcp-server.datalayer.tech/code-sandboxes/jupyterhub).
---
3. Configure Your Preferred MCP Client
Next, configure your MCP client to connect to the server. We offer two primary methods—choose the one that best fits your needs:
- **📦 Using `uvx` (Recommended for Quick Start):** A lightweight and fast method using `uv`. Ideal for local development and first-time users. - **🐳 Using `Docker` (Recommended for Production):** A containerized approach that ensures a consistent and isolated environment, perfect for production or complex setups.
<details> <summary><b>📦 Using uvx (Quick Start)</b></summary>
First, install `uv`:
pip install uv
uv --version
# should be 0.6.14 or higher
See more details on [uv installation](https://docs.astral.sh/uv/getting-started/installation/).
Then, configure your client:
{
  "mcpServers": {
    "jupyter": {
      "command": "uvx",
      "args": ["jupyter-mcp-server@latest"],
      "env": {
        "JUPYTER_URL": "http://localhost:8888",
        "JUPYTER_TOKEN": "MY_TOKEN",
        "ALLOW_IMG_OUTPUT": "true"
      }
    }
  }
}</details>
<details> <summary><b>🐳 Using Docker (Production)</b></summary>
**On macOS and Windows:**
{
  "mcpServers": {
    "jupyter": {
      "command": "docker",
      "args": [
        "run", "-i", "--rm",
        "-e", "JUPYTER_URL",
        "-e", "JUPYTER_TOKEN",
        "-e", "ALLOW_IMG_OUTPUT",
        "datalayer/jupyter-mcp-server:latest"
      ],
      "env": {
        "JUPYTER_URL": "http://host.docker.internal:8888",
        "JUPYTER_TOKEN": "MY_TOKEN",
        "ALLOW_IMG_OUTPUT": "true"
      }
    }
  }
}**On Linux:**
{
  "mcpServers": {
    "jupyter": {
      "command": "docker",
      "args": [
        "run", "-i", "--rm",
        "-e", "JUPYTER_URL",
        "-e", "JUPYTER_TOKEN",
        "-e", "ALLOW_IMG_OUTPUT",
        "--network=host",
        "datalayer/jupyter-mcp-server:latest"
      ],
      "env": {
        "JUPYTER_URL": "http://localhost:8888",
        "JUPYTER_TOKEN": "MY_TOKEN",
        "ALLOW_IMG_OUTPUT": "true"
      }
    }
  }
}</details>
---
1. **Port Configuration**: Ensure the `port` in your Jupyter URLs matches the one used in the `jupyter lab` command. For simplified config, set this in `JUPYTER_URL`. 1. **Server Separation**: Use `JUPYTER_URL` when both services are on the same server, or set individual variables for advanced deployments. The different URL variables exist because some deployments separate notebook storage (`DOCUMENT_URL`) from kernel execution (`CODE_SANDBOX_URL`).
What was scanned
The files the safety scan read, as written by the repository's author and shown as plain text. Lines with a finding are marked.
README.md · README · 454 lines
View this file on GitHub (read at the repository's current version: the scan did not record which commit it read)
This file has changed since it was scanned, so this is not exactly the text that was scanned, and no line is marked. The findings are listed with the safety scan above.
- <!--
- ~ Copyright (c) 2024- Datalayer, Inc.
- ~
- ~ BSD 3-Clause License
- -->
- <a href="https://datalayer.ai"><img alt="Datalayer" src="https://images.datalayer.io/brand/logos/datalayer-horizontal.svg" height="22"/></a>
- [](https://github.com/sponsors/datalayer)
- <div align="center">
- <!-- omit in toc -->
- # 🪐🔧 Jupyter MCP Server
- **An [MCP](https://modelcontextprotocol.io) server developed for AI to connect and manage [Jupyter](https://jupyter.org) Notebooks in real-time — and scale your [Code Sandbox](https://jupyter-mcp-server.datalayer.tech/code-sandboxes) from local to the cloud (Datalayer, Kaggle, Google Colab, Modal, Daytona, E2B, CoreWeave, Cloudflare...)**
- *Developed by [Datalayer](https://datalayer.ai) - Join our [Discord](https://discord.gg/YQFwvmSSuR)*
- [](https://pypi.org/project/jupyter-mcp-server) [](https://pepy.tech/project/jupyter-mcp-server) [](https://hub.docker.com/r/datalayer/jupyter-mcp-server) [](https://opensource.org/licenses/BSD-3-Clause)
- [](https://datalayer.ai)
- </div>
- 📖 [Documentation](https://jupyter-mcp-server.datalayer.tech) · 🔧 [Tools](https://jupyter-mcp-server.datalayer.tech/mcp) · 💬 [Community](https://jupyter-mcp-server.datalayer.tech/community)
- [](https://datalayer.ai)
- **No process to run.** Datalayer now hosts this server for you at
- **`https://mcp.datalayer.run/mcp`** — one endpoint for every agent and every notebook.
- Sign in from your browser, approve what the agent may do, and your work keeps running
- on the server after the agent disconnects.
- → [**Hosted Jupyter MCP Server**](https://datalayer.ai)
- [](https://datalayer.ai)
- [](https://github.com/datalayer/jupyter-mcp-server/tree/main/extensions/claude-plugin)
- **One command to connect Claude Code**, with `/datalayer:notebook`, `/datalayer:run` and
- `/datalayer:status` on top:
- ```
- /plugin marketplace add datalayer/jupyter-mcp-server
- /plugin install datalayer
- ```
- → [**Datalayer plugin for Claude Code**](https://github.com/datalayer/jupyter-mcp-server/tree/main/extensions/claude-plugin)
- ---
- **Free and open source, BSD 3-Clause** — point it at any Jupyter you already run, local or
- JupyterHub, no account needed.
- Built and maintained by [**Datalayer**](https://datalayer.ai), where the same server drives
- always-on Notebooks with GPU Code Sandboxes and durable execution — so your agent keeps
- working on your data when your laptop does not.
- [](https://datalayer.ai)
- ---
- [](https://jupyter-mcp-server.datalayer.tech/security/oauth)
- **No token to copy and paste.** An agent that meets this server unauthenticated is told
- where to authenticate, opens your browser, and you sign in to Datalayer as yourself. The
- agent never sees your password — it receives a token scoped to what you approved, and you
- can disconnect one agent without touching the others.
- What each agent may do is two separate decisions: the **scopes** you approve
- (`notebooks:read`, `notebooks:write`, `code:execute`, `data:read`) say what kind of
- operation it may perform, and your own Datalayer permissions still say which notebooks it
- may touch. An agent can never reach a notebook you cannot.
- Personal access tokens keep working, and remain the simpler path for a CLI or a script.
- → [**OAuth and identity**](https://jupyter-mcp-server.datalayer.tech/security/oauth)
- [](https://jupyter-mcp-server.datalayer.tech/releases)
- **Pin `code-sandboxes` to match your `jupyter-mcp-server`.** The sandbox variant
- `jupyter` was renamed to `jupyter-server` in `code-sandboxes` 1.1.1, and the two packages
- have to agree on the name.
- | Your `jupyter-mcp-server` | Install |
- | ------------------------- | -------------------------- |
- | **>= 1.5.0** | `code-sandboxes >= 1.1.1` |
- | **< 1.5.0** | `code-sandboxes <= 1.0.9` |
- ```bash
- # On 1.5.0 or later
- pip install "jupyter-mcp-server>=1.5.0" "code-sandboxes>=1.1.1"
- # Staying on an earlier jupyter-mcp-server
- pip install "jupyter-mcp-server<1.5.0" "code-sandboxes<=1.0.9"
- ```
- An older server with a newer `code-sandboxes` installs cleanly and then fails on the
- first execution with `Unknown sandbox variant: jupyter`.
- → [**Release notes**](https://jupyter-mcp-server.datalayer.tech/releases)
- ---
- [](https://github.com/datalayer/jupyter-mcp-server/releases#release-v2.0.0)
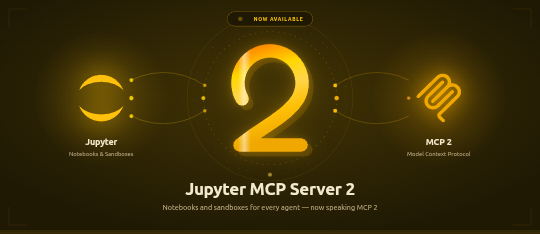
- **Jupyter MCP Server 2 runs on the [MCP Python SDK](https://github.com/modelcontextprotocol/python-sdk) 2**
- (`mcp>=2,<3`), the SDK's first major release. Nothing changes in how you start or
- configure the server, in the tools, or for the MCP clients connecting to it — the protocol
- is negotiated with each client as before. What changes is the Python environment:
- | Your `jupyter-mcp-server` | `mcp` SDK |
- | ------------------------- | --------- |
- | **>= 2.0.0** | `mcp >= 2` |
- | **< 2.0.0** | `mcp < 2` |
- Both are pinned in the package, so `pip` sorts it out; an environment holding another
- package that still pins `mcp<2` has to stay on `jupyter-mcp-server<2` until that package
- moves. Writing an extension or a custom token verifier against the SDK? See the
- [release notes](https://jupyter-mcp-server.datalayer.tech/releases) for the renamed
- imports.
- ---
- [](https://github.com/datalayer/jupyter-mcp-server/releases#release-v1.3.2)
- **`--provider` is now `--document-provider`** (env var `PROVIDER` → `DOCUMENT_PROVIDER`).
- It only ever chose where the notebook **documents** live — `jupyter` for the collaboration
- API of a Jupyter Server, `datalayer` for the Datalayer spacer — while the old name and its
- help text suggested it also chose where code runs. Execution is picked separately, with
- `--sandbox-variant` (`jupyter-server`, `datalayer`, `daytona`, `e2b`, `coreweave`,
- `cloudflare`, `kaggle`, `google-colab`, `monty`, `modal`).
- Nothing breaks in v1.3.2: `--provider` is still accepted as an alias, `PROVIDER` is still
- read, and a `/connect` payload carrying `"provider"` is still understood. Move to the new
- names when convenient — the old ones are deprecated, not removed.
- ---
- <div align="center">
- 
- </div>
- ## 📖 Table of Contents
- - [Key Features](#-key-features)
- - [MCP Overview](#-mcp-overview)
- - [Getting Started](#-getting-started)
- - [Sandbox Variants](#-sandbox-variants)
- - [Best Practices](#-best-practices)
- - [Contributing](#-contributing)
- - [Resources](#-resources)
- ## 🚀 Key Features
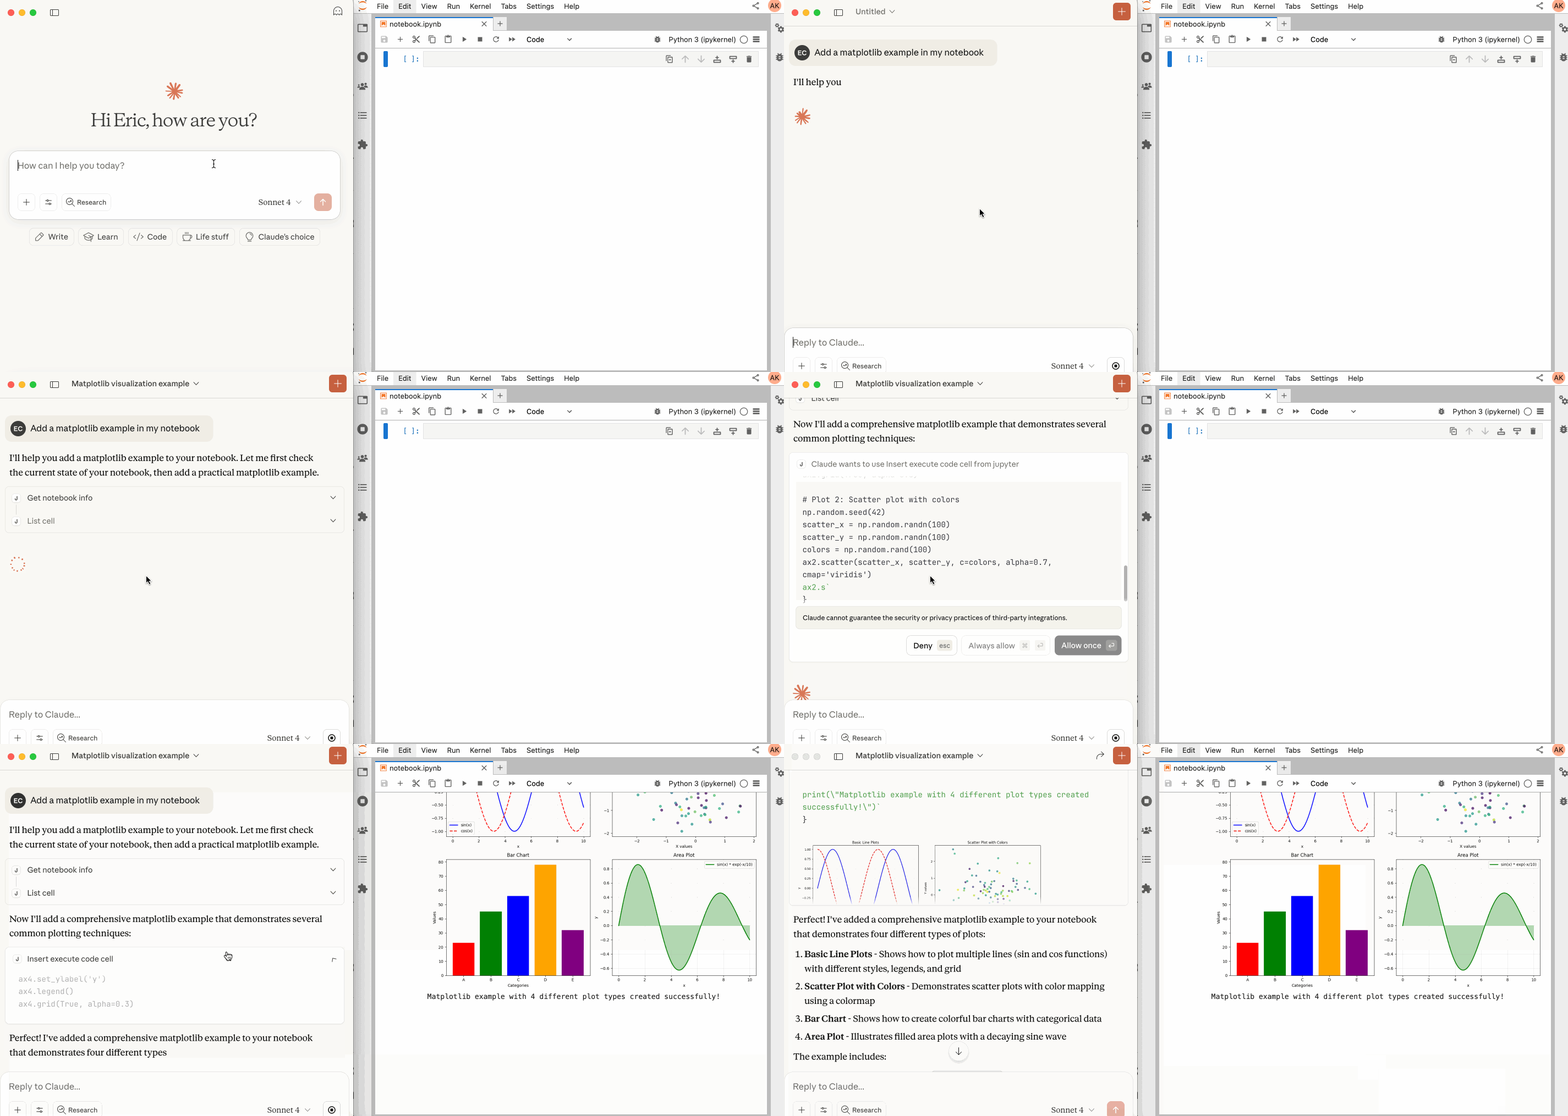
- - ⚡ **Real-time control:** Instantly view notebook changes as they happen.
- - 🔁 **Smart execution:** Automatically adjusts when a cell run fails thanks to cell output feedback.
- - 🧠 **Context-aware:** Understands the entire notebook context for more relevant interactions.
- - 📊 **Multimodal support:** Support different output types, including images, plots, and text.
- - 📚 **Multi-notebook support:** Seamlessly switch between multiple notebooks.
- - 🎨 **JupyterLab integration:** Enhanced UI integration like automatic notebook opening.
- - 🤝 **MCP-compatible:** Works with any MCP client, such as Claude Desktop, Cursor, Windsurf, and more.
- - 🔍 **Observability:** Built-in hook system with OpenTelemetry integration for tracing tool calls and kernel executions.
- Compatible with any Jupyter deployment (local, JupyterHub, ...) and with
- [**Datalayer**](https://datalayer.ai) hosted Notebooks, where the Code Sandboxes
- come with GPUs and the execution survives a disconnect.
- ## 🔧 MCP Overview
- ### 🔧 Tools Overview
- Every tool, with its parameters, schema and return value, is generated from a live
- snapshot of the running server and published at
- [**jupyter-mcp-server.datalayer.tech/mcp**](https://jupyter-mcp-server.datalayer.tech/mcp) — so it is never out of step with the
- code, which a table copied into this file would be.
- They fall into four groups:
- - **Server and code sandbox** — browse the Jupyter file system, list kernels, connect to
- a server at runtime, and launch, select and terminate code sandboxes.
- - **Notebooks** — open, create and switch between notebooks, list them, read one, restart
- its kernel, release it.
- - **Cells** — read, insert, delete, move, reorder and edit cells, surgically or wholesale,
- and clear their outputs.
- - **Execution** — run a cell or arbitrary code on the active backend, with multimodal
- output and streaming where the sandbox supports it.
- Sandbox tools need the optional `jupyter_mcp_sandboxes` extension; see
- [Sandbox Variants](#-sandbox-variants).
- #### JupyterLab Integration
- *Available only when JupyterLab mode is enabled. It is enabled by default.*
- In JupyterLab mode the server also exposes JupyterLab commands as MCP tools through
- [jupyter-mcp-tools](https://github.com/datalayer/jupyter-mcp-tools) —
- `notebook_run-all-cells` and `notebook_get-selected-cell` by default, with more
- selectable through `allowed_jupyter_mcp_tools`. The full list and how to configure it are
- in the [Additional Tools documentation](https://jupyter-mcp-server.datalayer.tech/operations/tools-jupyterlab).
- ### 📝 Prompt Overview
- The server implements the MCP
- [prompts feature](https://modelcontextprotocol.io/specification/2025-06-18/server/prompts).
- `jupyter-cite` cites specific cells from a notebook, the way `@` does in a coding IDE or
- CLI. Input parameters and returned content are in the
- [Prompts documentation](https://jupyter-mcp-server.datalayer.tech/operations/prompts).
- ## 🏁 Getting Started
- For comprehensive setup instructions—including `Streamable HTTP` transport, running as a Jupyter Server extension and advanced configuration—check out [our documentation](https://jupyter-mcp-server.datalayer.tech). Or, get started quickly with `JupyterLab` and `STDIO` transport here below.
- ### 1. Set Up Your Environment
- ```bash
- pip install jupyterlab jupyter-collaboration jupyter-mcp-tools ipykernel
- ```
- ---
- 
- To confirm your environment is correctly configured:
- 1. Open a notebook in JupyterLab
- 1. Type some content in any cell (code or markdown)
- 1. Observe the tab indicator: you should see an "×" appear next to the notebook name, indicating unsaved changes
- 1. Wait a few seconds—the "×" should automatically change to a "●" without manually saving
- This automatic saving behavior confirms that the real-time collaboration features are working properly, which is essential for MCP server integration.
- ---
- ### 2. Start JupyterLab
- ```bash
- # Start JupyterLab on port 8888, allowing access from any IP and setting a token
- jupyter lab --port 8888 --IdentityProvider.token MY_TOKEN --ip 0.0.0.0
- ```
- ---
- 
- If you are running notebooks through JupyterHub instead of JupyterLab as above, refer to our [JupyterHub setup guide](https://jupyter-mcp-server.datalayer.tech/code-sandboxes/jupyterhub).
- ---
- ### 3. Configure Your Preferred MCP Client
- Next, configure your MCP client to connect to the server. We offer two primary methods—choose the one that best fits your needs:
- - **📦 Using `uvx` (Recommended for Quick Start):** A lightweight and fast method using `uv`. Ideal for local development and first-time users.
- - **🐳 Using `Docker` (Recommended for Production):** A containerized approach that ensures a consistent and isolated environment, perfect for production or complex setups.
- <details>
- <summary><b>📦 Using uvx (Quick Start)</b></summary>
- First, install `uv`:
- ```bash
- pip install uv
- uv --version
- # should be 0.6.14 or higher
- ```
- See more details on [uv installation](https://docs.astral.sh/uv/getting-started/installation/).
- Then, configure your client:
- ```json
- {
- "mcpServers": {
- "jupyter": {
- "command": "uvx",
- "args": ["jupyter-mcp-server@latest"],
- "env": {
- "JUPYTER_URL": "http://localhost:8888",
- "JUPYTER_TOKEN": "MY_TOKEN",
- "ALLOW_IMG_OUTPUT": "true"
- }
- }
- }
- }
- ```
- </details>
- <details>
- <summary><b>🐳 Using Docker (Production)</b></summary>
- **On macOS and Windows:**
- ```json
- {
- "mcpServers": {
- "jupyter": {
- "command": "docker",
- "args": [
- "run", "-i", "--rm",
- "-e", "JUPYTER_URL",
- "-e", "JUPYTER_TOKEN",
- "-e", "ALLOW_IMG_OUTPUT",
- "datalayer/jupyter-mcp-server:latest"
- ],
- "env": {
- "JUPYTER_URL": "http://host.docker.internal:8888",
- "JUPYTER_TOKEN": "MY_TOKEN",
- "ALLOW_IMG_OUTPUT": "true"
- }
- }
- }
- }
- ```
- **On Linux:**
- ```json
- {
- "mcpServers": {
- "jupyter": {
- "command": "docker",
- "args": [
- "run", "-i", "--rm",
- "-e", "JUPYTER_URL",
- "-e", "JUPYTER_TOKEN",
- "-e", "ALLOW_IMG_OUTPUT",
- "--network=host",
- "datalayer/jupyter-mcp-server:latest"
- ],
- "env": {
- "JUPYTER_URL": "http://localhost:8888",
- "JUPYTER_TOKEN": "MY_TOKEN",
- "ALLOW_IMG_OUTPUT": "true"
- }
- }
- }
- }
- ```
- </details>
- ---
- 
- 1. **Port Configuration**: Ensure the `port` in your Jupyter URLs matches the one used in the `jupyter lab` command. For simplified config, set this in `JUPYTER_URL`.
- 1. **Server Separation**: Use `JUPYTER_URL` when both services are on the same server, or set individual variables for advanced deployments. The different URL variables exist because some deployments separate notebook storage (`DOCUMENT_URL`) from kernel execution (`CODE_SANDBOX_URL`).
- 1. **Authentication**: In most cases, document and code sandbox services use the same authentication token. Use `JUPYTER_TOKEN` for simplified config or set `DOCUMENT_TOKEN` and `CODE_SANDBOX_TOKEN` individually for different credentials.
- 1. **Notebook Path**: The `DOCUMENT_ID` parameter specifies the path to the notebook the MCP client default to connect. It should be relative to the directory where JupyterLab was started. If you omit `DOCUMENT_ID`, the MCP client can automatically list all available notebooks on the Jupyter server, allowing you to select one interactively via your prompts.
- 1. **Image Output**: Set `ALLOW_IMG_OUTPUT` to `false` if your LLM does not support mutimodel understanding.
- ---
- For detailed instructions on configuring various MCP clients—including [Claude Desktop](https://datalayer.ai/docs/mcp-clients/claude-desktop), [VS Code](https://datalayer.ai/docs/mcp-clients/vscode), [Cursor](https://datalayer.ai/docs/mcp-clients/cursor), [Cline](https://datalayer.ai/docs/mcp-clients/cline), and [Windsurf](https://datalayer.ai/docs/mcp-clients/windsurf) — see [MCP Client Configuration](https://jupyter-mcp-server.datalayer.tech/getting_started#mcp-client-configuration).
- ## 🧩 Sandbox Variants
- By default, code executes through the `code-sandboxes` `jupyter-server` variant against
- a Jupyter Server (`SANDBOX_VARIANT=jupyter-server`). Setting `SANDBOX_VARIANT` to any
- other value uses another [code-sandboxes](https://github.com/datalayer/code-sandboxes)
- engine via the sandbox's plain kernel client when the selected variant exposes
- one, so the same notebook tools can run code on additional backends.
- The spelling is not fussy: `google_colab`, `google-colab` and `GOOGLE-COLAB` all name the
- same variant. The names below are the canonical ones.
- Sandbox features are provided by the optional `jupyter_mcp_sandboxes` extension.
- To expose sandbox lifecycle tools (`launch_sandbox`, `list_sandboxes`,
- `use_sandbox`, `terminate_sandbox`) or run any non-`jupyter-server` sandbox variant,
- install it with `pip install jupyter_mcp_sandboxes`.
- | Engine | `SANDBOX_VARIANT` | Extra install | Key variables | Docs |
- | ------ | ----------------- | ------------- | ------------- | ---- |
- | Jupyter Server (default) | `jupyter-server` | — | `JUPYTER_URL`, `JUPYTER_TOKEN` | [Setup](https://jupyter-mcp-server.datalayer.tech/code-sandboxes/jupyter-server) |
- | JupyterHub | `jupyter-server` | — | `CODE_SANDBOX_URL`, `CODE_SANDBOX_TOKEN` | [Setup](https://jupyter-mcp-server.datalayer.tech/code-sandboxes/jupyterhub) |
- | Datalayer | `datalayer` | `jupyter-mcp-server[datalayer]` | `CODE_SANDBOX_URL`, `CODE_SANDBOX_TOKEN`, `SANDBOX_ENVIRONMENT` | [Setup](https://jupyter-mcp-server.datalayer.tech/code-sandboxes/datalayer) |
- | Kaggle | `kaggle` | `jupyter-mcp-server[kaggle]` | Kaggle credentials, or `CODE_SANDBOX_URL` for interactive mode | [Setup](https://jupyter-mcp-server.datalayer.tech/code-sandboxes/kaggle) |
- | Google Colab | `google-colab` | `jupyter-mcp-server` | `CODE_SANDBOX_URL`, `CODE_SANDBOX_ID`, `CODE_SANDBOX_PROXY_TOKEN` | [Setup](https://jupyter-mcp-server.datalayer.tech/code-sandboxes/google-colab) |
- | Monty | `monty` | `jupyter-mcp-server[monty]` | — | [Setup](https://jupyter-mcp-server.datalayer.tech/code-sandboxes/monty) |
- | Modal | `modal` | `jupyter-mcp-server[modal]` | Modal credentials | [Setup](https://jupyter-mcp-server.datalayer.tech/code-sandboxes/modal) |
- | Daytona | `daytona` | `jupyter-mcp-server[daytona]` | `DAYTONA_API_KEY`, or `DAYTONA_JWT_TOKEN` + `DAYTONA_ORGANIZATION_ID` | [Setup](https://jupyter-mcp-server.datalayer.tech/code-sandboxes/daytona) |
- | E2B | `e2b` | `jupyter-mcp-server[e2b]` | `E2B_API_KEY` | [Setup](https://jupyter-mcp-server.datalayer.tech/code-sandboxes/e2b) |
- | CoreWeave | `coreweave` | `jupyter-mcp-server[coreweave]` | `CWSANDBOX_API_KEY` | [Setup](https://jupyter-mcp-server.datalayer.tech/code-sandboxes/coreweave) |
- | Cloudflare | `cloudflare` | `jupyter-mcp-server[cloudflare]` | `CLOUDFLARE_SANDBOX_API_URL`, `CLOUDFLARE_SANDBOX_API_KEY` | [Setup](https://jupyter-mcp-server.datalayer.tech/code-sandboxes/cloudflare) |
- Each engine has its own page with the credentials it needs, the accelerator options it
- accepts and a worked client configuration — start from
- [**jupyter-mcp-server.datalayer.tech/code-sandboxes**](https://jupyter-mcp-server.datalayer.tech/code-sandboxes).
- ## 🧪 Testing
- Run the test suite:
- ```bash
- pytest tests/
- ```
- Required environment variables for tests:
- - None for the default local suite.
- Optional environment variables:
- - `TEST_MCP_SERVER`: `true`/`false` toggle for standalone MCP server mode tests (default `true`).
- - `TEST_JUPYTER_SERVER`: `true`/`false` toggle for Jupyter extension mode tests (default `true`).
- - `DATALAYER_API_KEY`: required only for Datalayer cloud smoke/integration tests.
- - `DATALAYER_RUN_URL`: optional custom Datalayer code sandbox URL for datalayer engine tests.
- - `SANDBOX_ENVIRONMENT`: optional cloud environment override (for example `ai-agents-env`).
- ## ✅ Best Practices
- - Interact with LLMs that supports multimodal input (like Gemini 2.5 Pro) to fully utilize advanced multimodal understanding capabilities.
- - Use a MCP client that supports returning image data and can parse it (like Cursor, Gemini CLI, etc.), as some clients may not support this feature.
- - Break down complex task (like the whole data science workflow) into multiple sub-tasks (like data cleaning, feature engineering, model training, model evaluation, etc.) and execute them step-by-step.
- - Provide clearly structured prompts and rules (👉 Visit our [Prompt Templates](extensions/prompt-templates/README.md) to get started)
- - Provide as much context as possible (like already installed packages, field explanations for existing datasets, current working directory, detailed task requirements, etc.).
- ## 🤝 Contributing
- We welcome contributions of all kinds! Here are some examples:
- - 🐛 Bug fixes
- - 📝 Improvements to existing features
- - 🔧 New feature development
- - 📚 Documentation improvements and prompt templates
- For detailed instructions on how to get started with development and submit your contributions, please see our [**Contributing Guide**](CONTRIBUTING.md).
- ### Our Contributors
- [](https://github.com/datalayer/jupyter-mcp-server/graphs/contributors)
- ## 📚 Resources
- Looking for blog posts, videos, or other materials about Jupyter MCP Server?
- 👉 Visit the [**Resources section**](https://jupyter-mcp-server.datalayer.tech/resources) in our documentation for more!
- ---
- <div align="center">
- **If this project is helpful to you, please give us a ⭐️**
- Made with ❤️ by [Datalayer](https://datalayer.ai)
- <img src="https://assets.datalayer.tech/datalayer-25.svg" alt="Datalayer Logo" width="200"/>
- </div>
Ratings and comments
Sign in to rate this skill.
Sign inFree to use. If it’s helped, pass it on.