mindpilot-mcp
See through your agent's eyes. Visualize legacy code, architect new systems, understand everything.
Safety scan
A static text scan, not a guarantee. Select the badge to see what was scanned and every finding.
Badge for your README

Markdown
[](/listings/abrinsmead--mindpilot-mcp)HTML
<a href="/listings/abrinsmead--mindpilot-mcp"><img src="/api/listings/abrinsmead--mindpilot-mcp/badge.svg" alt="findsafeskills safety rating" /></a>Install
Install instructions from the README
As written by the repo's author. findsafeskills has not verified these steps.
Claude Code
`claude mcp add mindpilot -- npx @mindpilot/mcp@latest`
Cursor
Under `Settings` > `Cursor Settings` > `MCP` > Click `Add new global MCP server` and configure mindpilot in the `mcpServers` object.
{
  "mcpServers": {
    "mindpilot": {
      "command": "npx",
      "args": ["@mindpilot/mcp@latest"]
    }
  }
}VS Code
Follow the instructions here for enabling MCPs in VS Code: https://code.visualstudio.com/docs/copilot/chat/mcp-servers
Go to `Settings` > `Features` > `MCP`, then click `Edit in settings json`
Then add mindpilot to your MCP configuration:
{
  "mcp": {
    "servers": {
      "mindpilot": {
        "type": "stdio",
        "command": "npx",
        "args": ["@mindpilot/mcp@latest"]
      }
    }
  }
}Windsurf
Under `Settings` > `Windsurf Settings` > `Manage Plugins`, click `view raw config` and configure mindpilot in the `mcpServers` object:
{
  "mcpServers": {
    "mindpilot": {
      "command": "npx",
      "args": ["@mindpilot/mcp@latest"]
    }
  }
}Zed
In the AI Thread panel click on the three dots `...`, then click `Add Custom Server...`
In the `Command to run MCPserver` field enter `npx @mindpilot/mcp@latest` and click `Add Server`.
What was scanned
The files the safety scan read, as written by the repository's author and shown as plain text. Lines with a finding are marked.
README.md · README · 177 lines
View this file on GitHub (read at the repository's current version: the scan did not record which commit it read)
- # Mindpilot MCP
- [](https://github.com/abrinsmead/mindpilot-mcp)
- [](https://www.npmjs.com/package/@mindpilot/mcp)
- [](https://github.com/abrinsmead/mindpilot-mcp/blob/main/LICENSE)
- See through your agent's eyes. Visualize legacy code, inspect complex flows, understand everything.
- > [!TIP]
- > Mindpilot is now available as a lightweight [agent skill](https://github.com/abrinsmead/skills/tree/main/mermaid-viewer)—no local MCP server needed. Ask your agent to diagram something and it builds a self-contained, interactive Mermaid viewer you can open in your browser or publish as a Claude artifact.
- >
- > Install with: `npx skills add abrinsmead/skills/mermaid-viewer`
- 
- ## Why Mindpilot?
- - **Visualize Anything**: Use your coding agent to generate on-demand architecture, code, and process diagrams to view your code from different perspectives.
- - **Vibe Checks**: AI-generated code can accumulate unused and redundant constructs. Use visualizations to spot areas that need cleanup.
- - **Local Processing**: Diagrams are never sent to the cloud. Everything stays between you, your agent, and your agent's LLM provider(s).
- - **Export & Share**: Export any diagram as a vector image.
- ## Prerequisites
- Node.js v20.0.0 or higher.
- ## Quickstart
- ### Claude Code
- `claude mcp add mindpilot -- npx @mindpilot/mcp@latest`
- ### Cursor
- Under `Settings` > `Cursor Settings` > `MCP` > Click `Add new global MCP server` and configure mindpilot in the `mcpServers` object.
- ```
- {
- "mcpServers": {
- "mindpilot": {
- "command": "npx",
- "args": ["@mindpilot/mcp@latest"]
- }
- }
- }
- ```
- ### VS Code
- Follow the instructions here for enabling MCPs in VS Code: https://code.visualstudio.com/docs/copilot/chat/mcp-servers
- Go to `Settings` > `Features` > `MCP`, then click `Edit in settings json`
- Then add mindpilot to your MCP configuration:
- ```
- {
- "mcp": {
- "servers": {
- "mindpilot": {
- "type": "stdio",
- "command": "npx",
- "args": ["@mindpilot/mcp@latest"]
- }
- }
- }
- }
- ```
- ### Windsurf
- Under `Settings` > `Windsurf Settings` > `Manage Plugins`, click `view raw config` and configure mindpilot in the `mcpServers` object:
- ```
- {
- "mcpServers": {
- "mindpilot": {
- "command": "npx",
- "args": ["@mindpilot/mcp@latest"]
- }
- }
- }
- ```
- ### Zed
- In the AI Thread panel click on the three dots `...`, then click `Add Custom Server...`
- In the `Command to run MCPserver` field enter `npx @mindpilot/mcp@latest` and click `Add Server`.
- ## Configuration Options
- - **Port**: The server defaults to port 4000 but can be configured using the `--port` command line switch.
- - **Data Path**: By default, diagrams are saved to `~/.mindpilot/data/`. You can specify a custom location using the `--data-path` command line switch.
- ## Multi-Client Support
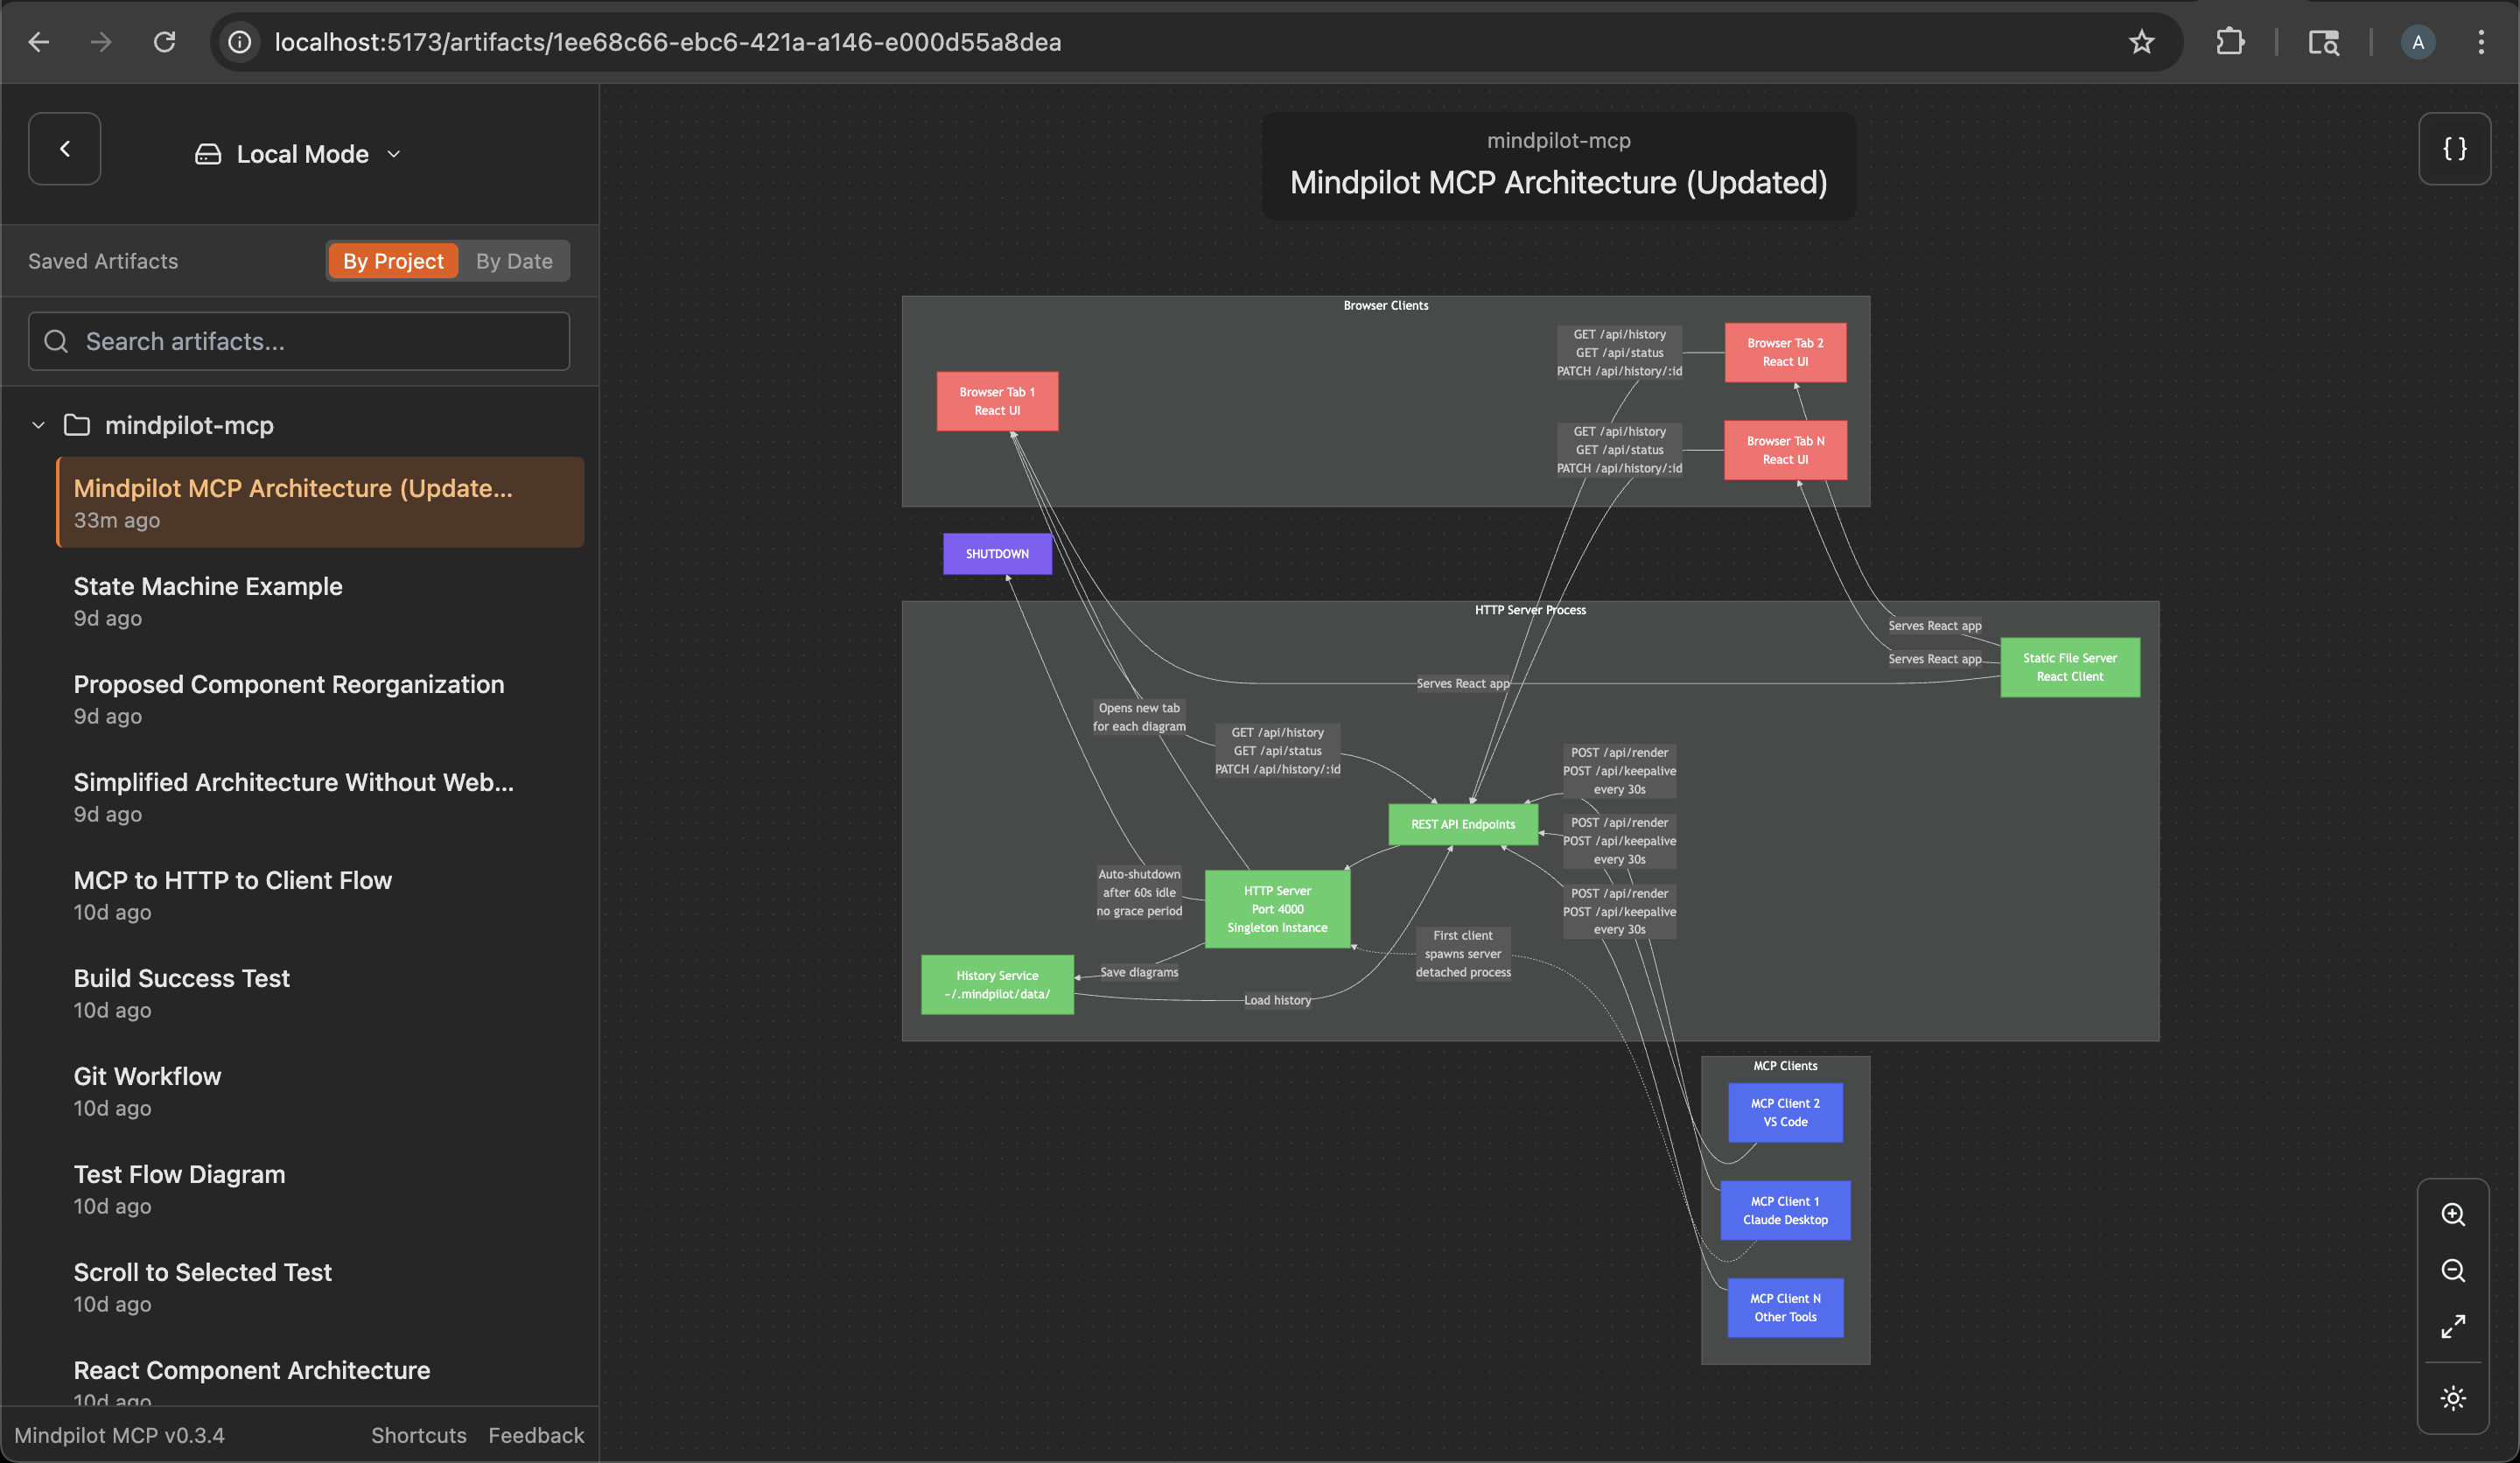
- Mindpilot intelligently handles multiple AI assistants running simultaneously. When you have multiple Claude Desktop windows or IDE instances open:
- - The first mcp client to use Mindpilot starts a shared web server
- - Additional assistants automatically connect to the existing server
- - All assistants share the same diagram history and web interface
- - The server will automatically shuts down a minute after the last MCP clinet disconnects
- This means you can work with multiple MCP hosts at once without port conflicts, and they'll all contribute to the same collection of diagrams.
- ## Anonymous Usage Tracking
- Mindpilot MCP collects anonymous usage data to help us understand how the product is being used and improve the user experience.
- ### Disabling Analytics
- If you prefer not to share anonymous usage data, you can disable analytics by adding the `--disable-analytics` flag to your MCP configuration:
- **Claude Code:**
- ```bash
- claude mcp add mindpilot -- npx @mindpilot/mcp@latest --disable-analytics
- ```
- **Other IDEs:**
- Add `"--disable-analytics"` to the args array in your configuration:
- ```json
- {
- "command": "npx",
- "args": ["@mindpilot/mcp@latest", "--disable-analytics"]
- }
- ```
- ## Using the MCP server
- After configuring the MCP in your coding agent you can make requests like "create a diagram about x" and it should use the MCP server to render Mermaid diagrams for you in a browser connected to the MCP server.
- You can optionally update your agent's rules file to give specific instructions about when to use mindpilot-mcp.
- ### Example requests
- - "Show me the state machine for WebSocket connection logic"
- - "Create a C4 context diagram of this project's architecture."
- - "Show me the OAuth flow as a sequence diagram"
- ## How it works
- Frontier LLMs are well trained to generate valid Mermaid syntax. The MCP is designed to accept Mermaid syntax and render diagrams in a web app running on http://localhost:4000 (default port).
- ## Troubleshooting
- ### Port Conflicts
- If you use port 4000 for another service you can configure the MCP to use a different port.
- Claude Code example:
- `claude mcp add mindpilot -- npx @mindpilot/mcp@latest --port 5555`
- ### Custom Data Path
- To save diagrams to a custom location (e.g., for syncing with cloud storage):
- Claude Code example:
- `claude mcp add mindpilot -- npx @mindpilot/mcp@latest --data-path /path/to/custom/location`
- Other IDEs:
- ```json
- {
- "command": "npx",
- "args": ["@mindpilot/mcp@latest", "--data-path", "/path/to/custom/location"]
- }
- ```
- ### asdf Issues
- If you use `asdf` as a version manager and have trouble getting MCPs to work (not just mindpilot), you may need to set a "global" nodejs version from your home directory.
- ```
- cd
- asdf set nodejs x.x.x
- ```
- ## Development Configuration
- Configure the MCP in your coding agent (using `claude` in this example)
- `claude mcp add mindpilot -- npx tsx <path to...>/src/server/server.ts`
- Run `claude` with the `--debug` flag if you need to see MCP errors
- Start the development client (Vite) to get hot module reloading while developing.
- `npm run dev`
- Open the development client
- `localhost:5173`
Ratings and comments
Sign in to rate this skill.
Sign inFree to use. If it’s helped, pass it on.